Tuesday, August 29, 2006

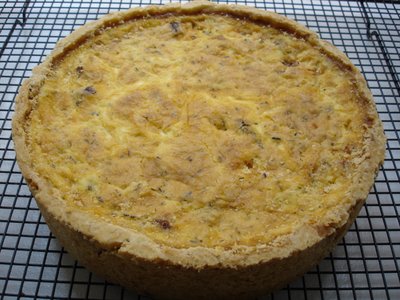
"Real" quiche


I have tagged several classic French recipes in my Bouchon cookbook that I want to try. One of them is Beef Bourguignon, which looks so complicated and time-consuming that I've delayed tackling it for the past six months. Now that it’s August, I have an excuse to prolong the delay since it’s not exactly hearty stew weather. Another of the recipes is for a classic French quiche. Well quiche isn’t too hard, right?

That's what I thought as I pulled ingredients together for quiche. I started making it in the early afternoon thinking that, served with a great green salad, it would make the perfect light summer dinner. I did not bother to read the entire recipe carefully before I started. I mean, it’s quiche -- how hard can it be? Wrong! This was the most time-consuming and scientifically precise recipe for quiche that I have ever seen. The process involved many steps of forming, blind-baking and cooling the shell, cooking, rendering and whipping the various fillings, and slow-cooking the quiche to create a creamy texture.

There are apparently a few keys to making the perfect, creamy quiche:

1) Using a 9-inch wide by 2-inch high ring mold and parchment paper vs. a classic pan to cook the quiche so that the bottom crust remains crusty and not soggy;

2) Whipping the custard mixture so that it’s frothy both to create a light texture and help suspend the fillings within the quiche;

3) Making sure the custard and all of the ingredients go into the oven warm so that the custard starts cooking as soon as it’s in the oven; and

4) Cooking it in an oven heated to no higher and no lower than 325 degrees so that the quiche is hot enough to prevent the custard from saturating the crust and making it soggy, and cool enough so that it cooks slowly, producing a creamy texture

Phew! Suffice it to say, dinner ended up being 24 hours later due to all of the steps involved, but boy was it worth it! The result was a true French quiche with a creamy texture and full flavor. I made Quiche Lorraine which was sumptuous given the slab bacon, comté cheese and “onion confit” (onions cooked for several hours with butter and a bouquet garni of thyme, parsley, bay leaves and black peppercorns). I’ll post the recipe for a basic quiche since it’s considerably shorter. If you’d like the specifics for the Quiche Lorraine, feel free to post a comment and I’ll pass on the (substantial) information.

For the dough:

Use the basic chilled pâte brisée recipe from the rustic fig tart post (doubled in quantity).

For the shell:

Roll the dough into a circle 14 inches in diameter and 3/16 inch thick. Re-chill the dough if it has become soft after rolling out.

Lightly brush the inside of a 9-inch wide by 2-inch high ring mold with canola oil and place it onto a parchment-lined baking sheet.

Carefully lift the dough into the ring (you can fold the dough over twice and then unfold it on top of the ring or use a rolling pin to roll-up, lift and then unroll onto the ring), center it on the ring and then lower the dough into the ring, pressing it gently against the sides and into the bottom corners of the ring. Trim any dough that extends more than an inch over the sides of the mold and reserve the scraps. Fold the excess dough over against the outside of the ring (to prevent it from shrinking down the sides as it bakes – the excess dough will be removed after the quiche is baked). Carefully check for any cracks or holes in the dough, and patch with the reserved dough as necessary. Place in the refrigerator or freezer for at least 20 minutes to resolidify the butter. Reserve the remaining dough scraps.

Put a rack set in the middle of the oven and preheat the oven to 375.

Line the quiche shell with a 16-inch round of parchment. Fill the shell with pie weights or dried beans, gently guiding the weights into the corners of the shell and filling the shell completely.

Bake the shell for 35 to 45 minutes or until the edges of the dough are lightly browned but the bottom is still light in color.

Carefully remove the parchment and weights. Check the dough for any new cracks for holes and patch with the thin pieces of reserved dough if necessary. Return the shell to the oven for another 15 to 20 minutes, or until the bottom is a rich golden brown. Remove from the oven and allow the shell to cool completely on the baking sheet. Once again, check the dough for any cracks or holes or and patch if necessary before filling the quiche batter. Turn the oven down to 325 degrees.

For the batter:

2 cups milk
2 cups heavy cream
6 large eggs
1 tablespoon kosher salt
¼ teaspoons freshly ground white pepper
6 gratings fresh nutmeg

Combine the milk and cream in a large saucepan and heat over medium heat until scalded (meaning a skin begins to form on the surface). Remove from the heat and let cool for 15 minutes before continuing.

Put 3 eggs, half the milk and cream mixture, 1 ½ teaspoons salt, 1/8 teaspoon white pepper, and 3 gratings of nutmeg in a blender and blend on low speed for a few seconds to combine the ingredients. Increase the speed to high and blend for 30 seconds to a minute, or until the batter is light and foamy. This is the first layer of the quiche: once you have assembled it, add the remaining ingredients to the blender and repeat the process to complete the quiche.

There may be a little excess batter depending on how much air is incorporated into the batter as it is blended. The quiche may sink slightly as it bakes. So check it after about 20 minutes and if there is room, add a bit more of the batter to the top.

Bake at 325 for approximately 1 ½ to 1 ¾ hours, or until the top of the quiche is browned and the custard is set when the pan is jiggled. The custard should jiggle uniformly throughout vs. jiggle more quickly in the center. Be aware that the quiche will continue to cook once out of the oven, and do not overcook.

The quiche needs to be thoroughly chilled before it’s cut, so make your quiche at least a day and up to three days before serving it. Trim any excess crust that extends above the custard using a serrated knife. Cut individual slices using a serrated knife for the side crust and a slicing knife through the custard and bottom crust and reheat in a 375 degree oven (for 15 minutes or until hot throughout) on a parchment-lined baking sheet before serving.

Tuesday, August 22, 2006

Indian food dinner (part 2 of 2)


As promised, this is the continuation of last week's Indian food dinner post -- this time with the recipes for the side dishes, stewed chickpeas and "beer rice." Bon appétit and please do let me know how it goes!

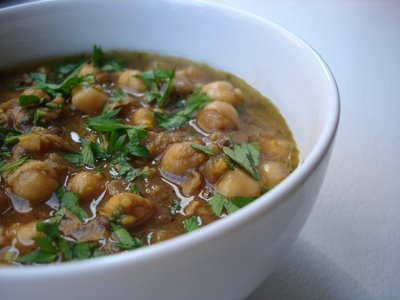
Stewed chickpeas (Chana)

3 tbs oil
2 cans of chickpeas drained (or 3-4 cups dry chickpeas, soaked overnight)
1 onion, chopped
3 tsp ginger, chopped
1 tsp cumin seeds
1/2 tsp of turmeric
pinch of asafoetida
2 tsp of ground coriander
1 tsp coriander seeds
4 cups water
2 tsp tamarind paste (or to taste)
Red chili powder and salt to taste

Heat oil in pan, add the cumin and coriander seeds and the asafoetida. Wait a few seconds until the cumin seeds "crackle", then add the onion. Sauté until the onion is brown. Add the turmeric and ginger, then all the remaining spices. Add the chickpeas and water. Bring to boil and add tamarind paste (stir it in to dissolve). Cook 30-40 minutes until tender. Add salt to taste. Garnish with cilantro.

Note: Adjust seasonings to your taste -- the seasonings above will result in a mild version. To thicken the sauce (if desired), crush some chickpeas with a woooden spoon against the side of your pot toward the end of the cooking time and continue to cook to thicken.


"Beer rice"

2 cups Basmati rice
1 teaspoon cumin seeds
1/2 - 1 bunch fresh cilantro (coriander) - chopped coarsely
1 bottle beer - most lagers / ales work well
2-3 tbs oil

Heat the oil and add the cumin seeds - wait for them to "crackle". Add the rice and lightly move the grains around to coat them with oil. Wait until they become chalky. Mix the cilantro in with the rice. Add the beer and enough water for there to be 4 cups of liquid in the pot (should be about ~2 1/2 cups of water in addition to the beer). Add salt to taste. Bring the liquid to a boil, lower the heat, cover the pot and let the rice cook for ~15 minutes. Turn off the heat and let it sit covered for an additional 5-7 minutes.

Tuesday, August 15, 2006

Indian food dinner (part 1 of 2)


We had a HUGE treat last week. Friends of ours called to ask if we wanted to cook an impromptu meal together on Saturday night. I suggested we cook Indian food as they are experts on the subject and I appreciate Indian food but know nothing about cooking it. In no time at all my friend D, an enthusiastic cook, came up with a multi-course menu and we divided up a shopping list. We then met back at home where his wife and I dutifully followed all cutting, chopping and blending orders while he whipped around the kitchen turning our choppings into sumptuous fare. It was such a luxury to be treated to a home cooked meal (in our own home!) and to have no more responsibility than to mindlessly chop away while someone else worried about assembling the dishes. We had a wonderful meal of cold cucumber soup, beef curry, mustard shrimp and chickpeas served with Basmati rice infused with cilantro, and of all things, beer. The leftovers were even more magnificent the next day. I'm breaking this post into two to keep you in suspense -- check back next week for the chickpeas and rice.

(Recipes courtesy of D & T)

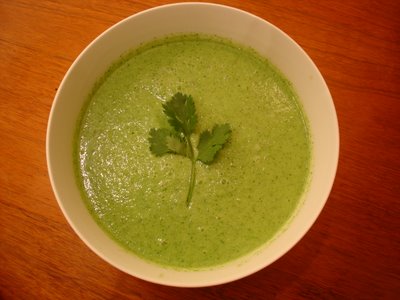
Chilled cucumber soup

2 English cucumbers, peeled
3 cloves of garlic (note: 3 cloves will make a fairly garlicy soup (which we like). You might want to start with 1 clove and add more to suit your own taste)
1 green chili
2-3 tablespoons of extra virgin olive oil
1 quart buttermilk (or plain yogurt)
1/2 bunch coriander (cilantro) leaves
Salt to taste
Optional: ground roasted cumin

Blend all ingredients together. Adjust the consistency of the soup by adding water as desired. Add olive oil. Chill in refrigerator and before serving garnish with roasted cumin and a sprig of coriander leaves (optional).


Beef curry

1 medium onion, chopped
3 cloves garlic, crushed/chopped fine
1 tablespoon ginger, chopped fine
1.5 lb stew beef, cubed (or lamb or veal)
1 can coconut milk
4-5 whole cloves
1-2 sticks of cinnamon (try to get Indian cinnamon if possible - less sweet than American)
2-3 bay leaves
ground cumin
ground coriander
pinch of red chili powder or more to taste
dry mango powder ("amchur") or lemon juice to taste
salt to taste

Sauté the onion, garlic, ginger until golden brown and the oil separates. Add the beef cubes and brown. Add the spices and 1/2 the coconut milk and enough water or beef stock to cover the meat. If you have a pressure cooker, bring to pressure and cook for 1-1.5 hours. If not, braise on low heat for 3-4 hours until meat is tender. Add the remaining coconut milk and salt to taste.
Variation: replace cumin and bay leaves with black mustard seeds and curry leaves. Fry the mustard seeds in a teaspoon of oil before adding to the pan.
I am a Manhattan-based photographer specializing in two of the best things in life: food and children.

I love the challenge and diversity of both subjects, but I most enjoy the pleasure my images -- whether mouth-watering shots of delicious dishes or tender portraits of newborn babies -- bring to my clients.

I love the creative process of turning a concept into a reality. I typically do my own food and prop styling and love every part of a shoot, from talking to the client about their needs, to developing a vision for the shoot. I love finding the perfect props to support the vision, shopping for the best ingredients, and cooking, styling and shooting a dish in a way that best communicates the vision.

My work can be seen regularly in The New York Times Dining Section, numerous cookbooks, magazines and in the marketing materials of many private clients.

For more information about my food photography, please see www.sabrakrock.com. For additional information about kids photography, please see www.sabrakrockkids.com.

Thursday, August 03, 2006

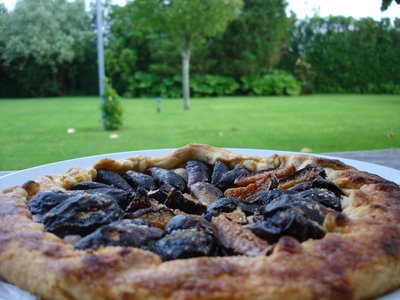
Rustic fig tart


I've been taking a pastry class at the Institute of Culinary Education which has inspired a lot of weekend pastry making. Pastry is the one major hole in my dessert repertoire; I can do cookies, cakes and cupcakes without issue but I've never mastered the art of pastry making so this is my chance. During the first session we learned two basic doughs which offer endless possibilities: pâte brisée, (a flaky dough), and pâte sucrée, a sweet and slightly dense pastry dough. The former is a little tricky for a few reasons: 1) it requires quick work to keep the dough from becoming warm, melting the butter and losing its eventual flakiness 2) it needs to be kneeded without overworking it lest it become tough and 3) it can’t be patched well and needs to be rolled out only once.

There is so much gorgeous fruit in farmers markets now I was inspired to try a fig tart with beautiful fresh figs. I used my class dough recipe and some simple instructions for making a fig tart adapted from one of my favorite seasonal cookbooks.

For the dough (makes 1 1-crust pie)

1 ¼ cups (about 5 ½ ounces) all-purpose unbleached flour
¼ teaspoon salt
1/8 teaspoon baking powder
8 tablespoons (1 stick) cold unsalted butter
2 to 3 tablespoons cold water (put ice cubes in glass of cold water to chill)

For the filling

6 tablespoons sugar or less if fruit is quite ripe
1/5 lbs fresh figs

To make the dough

Combine flour, salt and baking powder in a medium mixing bowl and whisk to mix. Pour mixture onto a clean, smooth surface such as a stainless steel table. Cut butter into tablespoon-sized pieces and add to dry ingredients. Toss once or twice to coat pieces of butter. Use your hands to rub the butter into the dry ingredients by breaking it into tiny pieces, continuously pinching and squeezing it into the dry ingredients. Be careful to keep the mixture uniform by occasionally reaching down to the bottom of the mixture and mixing all the ingredients evenly together. Continue rubbing the butter into the dry ingredients until the pieces of butter are dime/nickel-sized. Create a well in the center of the dough, spoon 2 tablespoons of the water into the hole, and mix gently with your fingertips, gradually working the water into the dry ingredients. The mixture will crumbly in the beginning but should begin to come together into a ball. If the mixture still appears crumbly after working it, add the remaining water (plus more if needed after mixing together), 1 teaspoon at a time, until the dough holds together easily. (Note: too little water makes a flaky crust that will crack during rolling; too much water makes an elastic, bread-like crust that lacks flakiness. Do not over-work the dough or it will become tough.) When finished, you should have a ball of dough with small pieces of butter still visible in the mixture. Wrap dough in plastic wrap and press it into a 6 inch disk. Refrigerate until firm, or until you are ready to use it, at least 1 hour.

To make the tart

Clean and dry work surface. Dust lightly with flour. Wipe rolling pin clean. Dust lightly with flour. Pound dough with rolling pin in two directions so it begins to spread out then roll dough into a ~9 inch disk by rolling in one direction (away from you), turning dough 90 degrees and rolling away from you again. Repeat process until you have a 1/8 inch think disc, dusting more flour under dough and on rolling pin if it sticks.

Trace a ~9 inch circle in dough using the bottom of a tart pan as a guide. Quarter figs through the stem or, if large, cut them in sixths. Set aside in a bowl. Just before you are ready to assemble galettes, sprinkle figs with 6 tablespoons of sugar and toss gently to distribute. Transfer dough to a heavy baking sheet. Arrange figs attractively on dough, leaving a 1 ½ inch edge all the way around. Fold the edge over to create a border making sure there are no cracks in the dough or the fruit juices will seep out during baking. Patch, if necessary, with bits of trimmed dough lightly moistened with cold water.

Brush border with a little egg wash (1 yolk lightly beaten with a pinch of salt), then sprinkle the border generously with sugar. Bake at 425 degrees until crust is golden and fruit is bubbly, 22 to 25 minutes. Transfer to a rack and cool slightly before serving.

Variations:
Make several individual tarts instead of one large tart